The layout of a glassblower's bench is a personal thing - there is no right or wrong way to lay out your tools. Some people like their tools and equipment to their right, others find it easier to have everything to the left. Some like to stand while they work, others sit. The only constant is
safety. Protection of yourself, equipment and property should always be your first consideration in a set-up you create. Take the time to understand the various properties of the material and equipment you're working with and use that information as a guide in your set-up.
The Bench Top
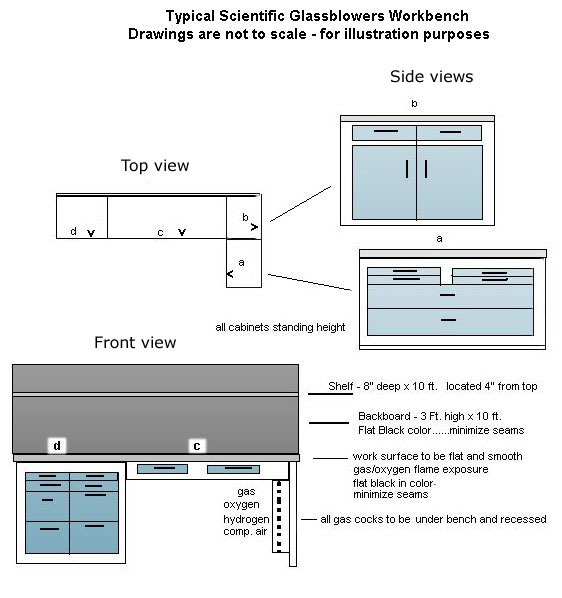
A flat, level, non-combustible bench top surface about five (5) feet long and at least thirty (30) inches deep should be considered a minimum size work area. A back shield is beneficial for safety and practical reasons. If the back shield is constructed of the same material as your bench top it will provide some fire protection. Glass will be easier to see if the background has a flat, smooth non-textured surface. You may find that painting the bench top and back shield flat black will help in determining the color of heated glass during the glassblowing process. The wall thickness of the glass will also be more apparent against a solid background.
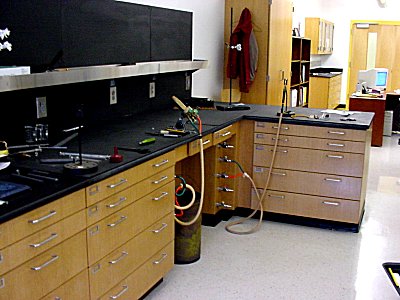
Here is an example of a professional glassblowing workstation at East Carolina University:

And this is how the glassblower designed his workspace:

A photo tour of their glassblowing facility is available if you are interested.
| Tutorial Lesson 3, The Glassblower's Bench |
|---|
Lesson 2
(Terminology) |
Lesson 4
(Oxygen and Fuel Gas Systems) |


